Fermented Foods

As I researched this topic, I payed close attention to the fermented products for sale at the grocery store. Kimchi, sauerkraut, and pickles were available, but they weren’t cheap. Also, they didn’t taste nearly as good as anything I’ve made myself.


Here are some reasons to get into fermentation at home:

  • Tradition – our ancestors did it and because of them, we have some of the best products: cheese, beer, wine, chocolate, miso
  • FLAVOR! – Little pops of flavor add interest and complexity when used to garnish our meals
  • Preserve the Garden – we get to prolong the fresh, ripe vegetables and experience more variety across seasons; buh bye food waste
  • Probiotics + Prebioticsnutrient-dense plants and beneficial bacteria are great for digestion and regulating blood sugar

To get you on your merry fermenting way, I’ll share a few recipes for fermenting radishes, cabbage, beets, cauliflower, and more. Those recipes, plus the basic formulas you need to know to ferment any vegetable.

So Why Ferment Vegetables?

Fermentation is a technique for preserving foods. With evidence of fermented vegetables dating as early as 6000 BC, fermentation is a traditional method to store and nutritionally enhance food. The most common process to ferment foods, such as vegetables, is in jars filled with a mix of salt and water (called a brine).


Through the rise of adopting sustainable food practices and understanding of the health benefits of fermented vegetables, the main benefits of fermentation are:


  • Fermentation reduces food waste, so you can ferment fresh produce which would otherwise be thrown away. It’s also great way to use seasonal produce when there is excess that is too much to be consumed fresh.
  • Improves gut health, with the increase of probiotics, good bacteria and enzymes in the fermented food to boost digestibility.
  • Increases the nutritional value of foods, aiding the body’s ability to absorb the vitamins and minerals available in the fermented foods.

 If you’ve been experimenting with how to ferment vegetables at home, you may be familiar with the process of making your own fermented vegetables with salt and water.

What is the difference between fermenting and pickling?

While both pickling and fermenting produce different results, there are some areas of overlap that can easily spark some confusion. Here’s what you need to remember: Pickling involves soaking foods in an acidic liquid to achieve a sour flavor; when foods are fermented, the sour flavor is a result of a chemical reaction between a food’s sugars and naturally present bacteria — no added acid required.

More About Pickling

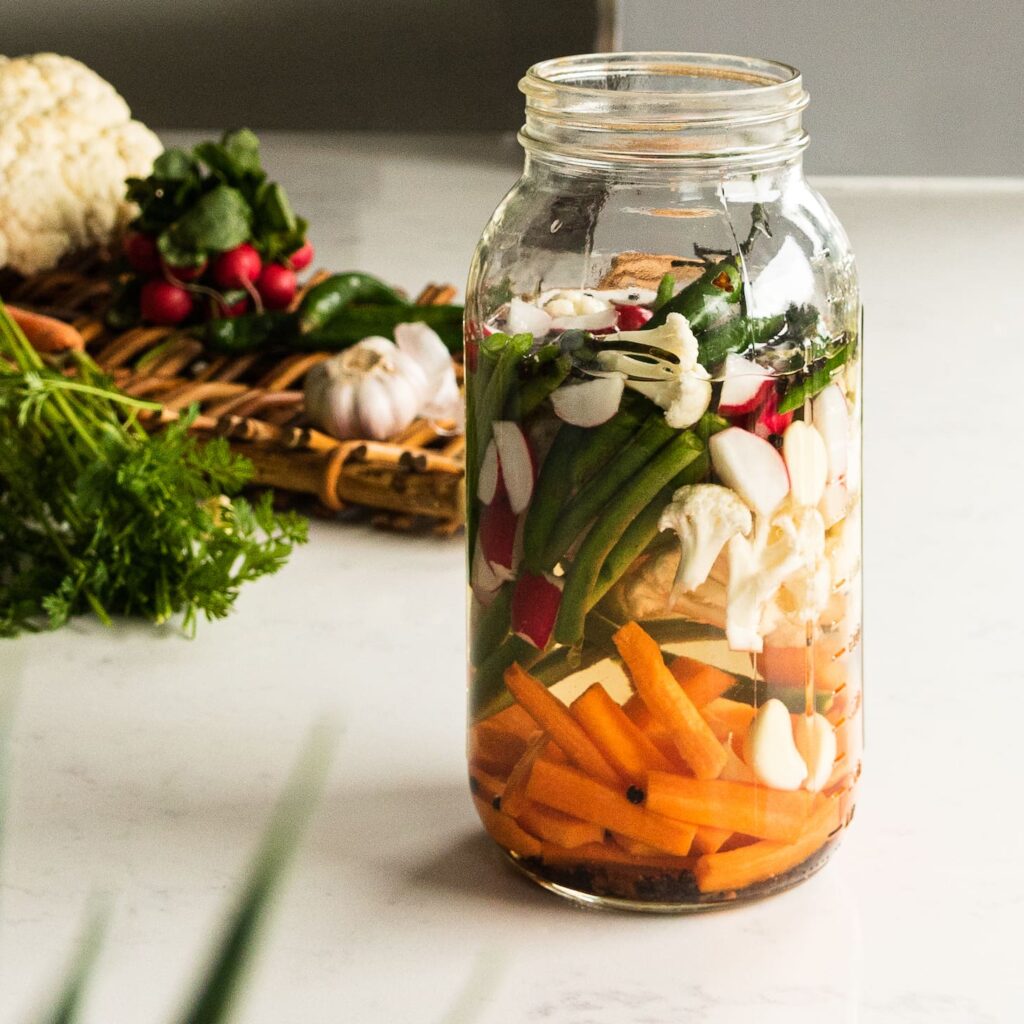
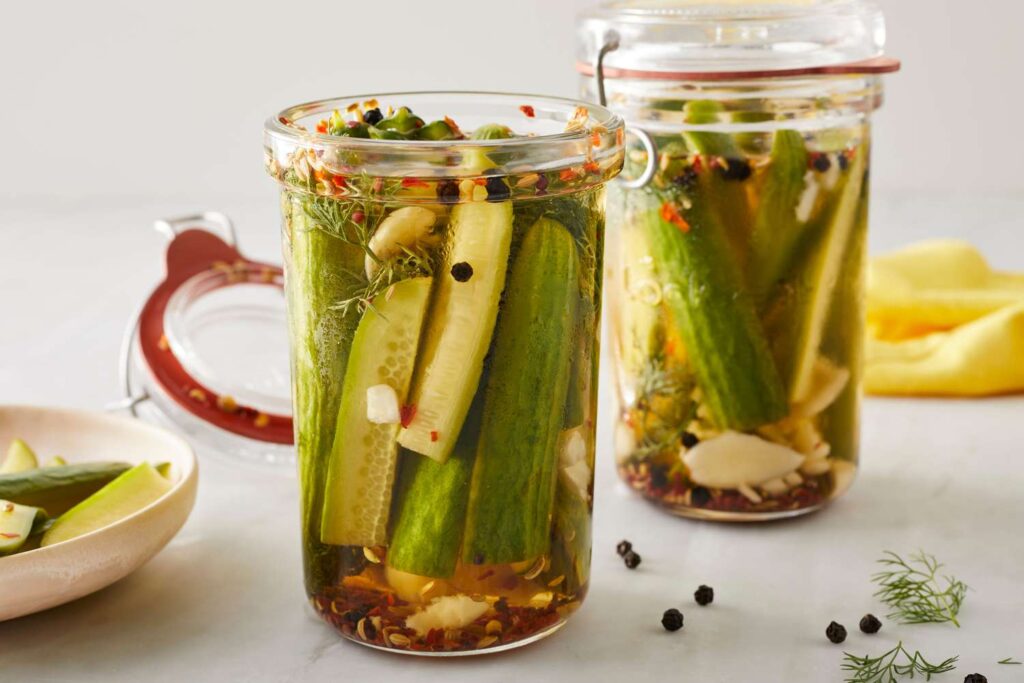
Pickling is a method of food preservation that works by immersing foods in an acidic solution, like vinegar, that changes both the taste and texture of the food. It also involves the use of heat, which serves to destroy and inhibit the growth of any microorganisms.


The fastest and easiest way is quick pickling, in which vinegar along with sugar, salt, and sometimes various herbs or spices are brought to a boil and then poured over fruits or vegetables that are left to soak for a short time. I’m not a big fan of using added sugar to soak veggies in—it’s not needed and added sugars are not good for your health.

Fermented Pickles

See my recipe for making delicious fermented pickles.

Fermented Veggies

You can ferment just about any veggie like beets, cauliflower, green beans, cucumbers, cabbage, carrots, mushrooms, radishes, broccoli or zucchini for example.


Prepare the Veggies…

Give the vegetables a good wash. If you usually peel the vegetables when you eat them raw, peel them for this process. Carrots, radishes, beets, zucchini, mushrooms, broccoli, and cauliflower are all great vegetables to ferment.


Chop or shred the vegetables very small; the smaller or finer they are will help them to ferment faster. It’s a matter of personal preference and how you intend to use the finished product.


For example, carrots can be chopped, shredded, diced, or cut into coins or matchsticks. At the very least, cut the vegetables into bite-size pieces.


Make the Fermentation Brine

The fermentation brine is made from 1 tablespoon of salt per cup (natural, non-iodized, and chlorine-free water). The salt prevents mold organisms from growing and produces beneficial probiotic bacteria.


The best salts are sea salt, Himalayan salt, pickling salt, and kosher salt. Avoid iodized salt and salts that include anti-caking agents, often in table salt and some kosher salts. Mix the salt and water until the salt dissolves.


It is time to fill the jars. Layer the vegetables and any herbs or seasoning in the jars as firmly as possible and pour the brine over them while leaving 1-2 inches of head space.


Ideas for herbs: Garlic, ginger, bay leaves, dill, fresh thyme, caraway seeds, and red pepper flakes are all great herbs and seasoning ideas.

Now, pour the salt and water mixture to the top of the veggies.The vegetables MUST remain submerged in the brine; any air exposure will rot. Use a fermentation weight to keep the floaties down.

If some sort of weight is NOT used, the veggies could get exposed to the air and cause mold and you don’t want that. 


Put a cloth and a rubber band on top to let it breath (or a store bought device to let the process happen). Place in a room temperature place to sit. The process will allow bubbles to escape out while the fermentation process starts naturally.

How long does it take for fermentation?

The fermentation times can vary from three days to six months, depending on the vegetables, temperature, and flavor you seek.


The best way to know when it’s ready is to taste it. Once it reaches the optimal flavor and crisp, move the jars to the refrigerator to stop any further fermentation.


A great way to find your optimal fermentation time is to make several jars at a time and let some ferment longer than others. Leave one for one week, one month, three months, and so on.

How to Make Sauerkraut

Serves 6–8/Prep: 20–25 min/Ferment for 7–10 days

Ingredients:

  • 1 head of cabbage, shredded (green or red), with one large, outer leaf reserved
  • ¾ tbsp sea salt or Himalayan salt
  • 1 liter glass jar

The creation:

Place the shredded cabbage in a large bowl. Continuously turn the cabbage as you sprinkle the salt onto it, until all the salt is distributed. Smash and squeeze the cabbage with your hands or press a mallet onto it for 10 minutes while constantly turning it over.


Let it sit for 10 to 15 minutes. The mixture should be wet with a small amount of liquid at the bottom.


Pack the cabbage into the jar with a wide mouth, smashing it down into the jar with your hand. Cover it with the remaining brine almost to the top of the jar. Leave about an inch or so at the top and cover with the outer leaf, smashing it in as necessary. This will keep the shredded cabbage under the brine. Place a piece of the cabbage core on top to act as a weight. Screw the jar on loosely so gas can escape as fermentation takes place. Alternatively, you can cover the top with a piece of cloth and secure it with a rubber band. This also allows fermentation to can take place.


Leave at room temperature (67° to 75°F) for 5 to 7 days. During this process the sauerkraut will bubble or foam, and the brine will get cloudy. When it’s ready, throw away the cabbage core and leaf. Now enjoy your sauerkraut. Store the jar in the refrigerator for up to 3 months.

I hoped you enjoyed reading!

Adrienne 😉

xo